Last updated November 17, 2026



Free written scope consultation - allowances, timeline, and change-order rules on paper before a single trade is scheduled
Driveway & Pavers Maintenance Checklist for Fremont Homeowners
A paver driveway that looks perfect in September can have six inches of joint sand washed out and a soft base by February. Not because the installation was bad. Because nobody re-sanded before the rains hit. That one task, roughly $80 in materials for a typical two-car driveway, is what stands between a sound surface and a $4,000 re-base job. Fremont runs one of the sharpest dry-wet splits in the Bay Area: close to zero rain from May through October, then concentrated storm runoff from November through March. Paver joints and base compaction fail on that rhythm, not on a generic spring-cleaning schedule. This guide gives you a month-by-month task list tied to the climate Fremont actually has.
Quick Answer
In Fremont, a paver driveway needs three things on a fixed calendar: a joint-sand top-off and sealer check in October before the first rains, a base-softening and drainage inspection in March once the storms pass, and weed and efflorescence monitoring through the dry months. Budget $1.50 to $2.50 per square foot for professional joint re-sanding, and treat any hollow sound underfoot after winter as a base problem, not a cosmetic one.
Styles & brands we work with
- Kitchen remodeling
- Bathroom remodeling
- Home additions & ADU
- Roofing
- Windows & doors
- Driveway & pavers
- Fence
Table of Contents
- Why Fremont’s Climate Breaks Pavers Differently
- The October Pre-Rain Checklist
- Joint Sand and Sealer: Getting the Order Right
- The March-to-April Post-Rain Inspection
- Weed Pressure in Alameda County Paver Joints
- Reading Efflorescence as a Drainage Signal
- Repair Cost Benchmarks for Fremont Driveways
- Common Mistakes to Avoid
Why Fremont’s Climate Breaks Pavers Differently
Most paver maintenance advice is written for climates with steady year-round moisture. Fremont doesn’t have that. May through October is bone dry, with weeks of triple-digit afternoons in the Warm Springs and Irvington flats and cooler, foggier conditions up toward the Niles hills. Then November arrives and the rain comes in a handful of concentrated storms rather than a slow soak.
That swing does two things to a driveway. First, the dry season shrinks and cracks the joint sand, opening channels. Second, the first heavy storm sends water through those channels fast, scouring sand out of the joints and pushing it toward the street or the garage apron. If the base course underneath wasn’t compacted well or the drainage slope is marginal, that water sits instead of running off, and the bedding layer softens.
We’ve seen this pattern repeatedly in the older tracts around Centerville and Glenmoor, where driveways slope gently toward the garage rather than the street. A driveway that drains fine in July can pond two inches deep at the garage door by January. The fix isn’t a rebuild. It’s re-sanding in October and catching the slope problem before the bedding layer gives.
One more local factor: soil. Much of Fremont sits on expansive clay that swells when wet and shrinks when dry. That movement is gentle under a well-compacted base, but it punishes a thin or poorly drained one. It’s also why base repairs in Fremont often cost more than homeowners expect once a crew opens up the surface and finds soft clay that needs removal and replacement. None of this is visible from the top. That’s the whole problem.
The October Pre-Rain Checklist
October is the single most important month on this calendar. Everything you do before the first real storm saves money in February. Work through these steps in order.
- Check joint sand depth. Joint sand should sit roughly 1/8 inch below the paver chamfer, not flush and not sunken. Walk the driveway and probe joints with a screwdriver or a stiff piece of wire. Any joint where the sand has dropped more than a quarter inch is scoured and needs topping off before rain.
- Clear the drainage path. Sweep and blow leaves and seed pods out of the driveway, the apron, and any channel drain. A clogged drain turns a manageable storm into standing water against the garage threshold.
- Inspect the perimeter. Look at where the driveway meets the lawn, the fence line, and the garage slab. Gaps there let water under the edge restraint, which is where base erosion usually starts. Catch it before the wet season and it’s a minor fix.
- Re-sand the joints. Use a proper joint sand, swept in dry and compacted. Polymeric sand is the right call for most Fremont driveways because it sets up and resists washout through the storm season.
- Decide on sealer now, not later. If you’re sealing, it needs to go down on dry pavers with no rain forecast for at least 24 hours. In Fremont that means finishing by mid-to-late October, before the storm window opens.
If you’re not comfortable assessing joint depth or drainage slope yourself, this is exactly the kind of walkthrough a professional does quickly. Our Driveway & Pavers in Fremont team handles pre-season inspections across Fremont and can tell you in plain terms whether your joints are scoured or your base is suspect.
Joint Sand and Sealer: Getting the Order Right
The most common sequencing error we see is sealing over scoured joints. Sealer locks the surface, but if the joints underneath are half-empty, the seal does nothing to stop the next storm from washing out what’s left. Sand first, always. Sealer second, and only when the joints are full and the pavers are bone dry.
Polymeric versus standard sand
Both have a place, and the choice depends on the driveway, not on habit.
- Polymeric sand binds when activated with water and resists washout. It’s the right choice for Fremont driveways because our storms arrive concentrated and fast. It also suppresses weeds more effectively than loose sand. Expect it to need refreshing every few years, not every season.
- Standard (non-polymeric) joint sand is cheaper and easier to top off, but it scours out faster under heavy runoff. It makes sense on a very sheltered driveway or where budget is the deciding factor, provided you’re willing to check it every October.
Brand matters less than gradation. A properly graded joint sand locks into the joint instead of sitting on top. Techo-Bloc and Unilock both publish recommended joint sand specs for their paver lines, and matching the sand to the paver improves how well it stays put.
Sealer timing
Sealer protects against staining, slows efflorescence, and helps hold joint sand in place, but it needs a dry window to cure. In Fremont, aim to seal in October, before the rains, on a stretch of clear days. Sealing in November risks trapped moisture and a cloudy finish. Sealing in the dry summer months works too, but it doesn’t protect the joints through the storm season the way an autumn application does.
The March-to-April Post-Rain Inspection
Once the storms taper off, usually by mid-March, the driveway tells you what winter did to it. This inspection is about finding base problems before they become trip hazards or drainage failures.
- Walk the surface and listen. A hollow or dull thud underfoot, versus a solid tap, signals a void or soft spot in the bedding layer. Mark those spots.
- Look for settlement and rocking pavers. Any paver that rocks when you step on it, or sits lower than its neighbors, has lost support. This is the earliest visible sign of base softening.
- Check for ponding stains. Dark patches or silt rings after a storm show where water sat. Standing water over a joint is water getting into the base.
- Inspect the garage apron and edge restraints. Look for gaps, cracks, or paver movement along the edges. A failed edge restraint lets the whole field spread.
- Probe a suspect spot carefully. If a paver rocks, lift it only if it comes up easily and check the bedding sand and base underneath. Soft, wet clay means a localized base repair. Firm, dry base means the paver just needs re-bedding.
If you find more than a couple of soft spots clustered together, get a professional read before you drive on it. Soft base under a paver driveway is a genuine safety issue, both for tripping and for vehicles, and it compounds quickly once water has a path in.
Weed Pressure in Alameda County Paver Joints
Fremont’s dry summers and wet winters favor a specific set of weeds that exploit paver joints. The usual suspects in Alameda County are spotted spurge, which thrives in hot dry joints and spreads flat along the surface; purslane, which loves the warm months; and annual grasses like crabgrass and foxtail that germinate in the wet season and push up through open joints in spring. Oxalis and creeping woodsorrel show up in shadier, damper sections, often near fences and north-facing edges.
The weeds aren’t the disease. They’re the symptom: an open joint with enough organic matter and moisture for a seed to take hold. Two things suppress them:
- Full joints with polymeric sand. A properly filled, bound joint leaves no seed bed. This is why re-sanding in October is also weed control, not just joint protection.
- Targeted herbicide matched to the species. Pre-emergent applied before the wet season slows germination; post-emergent knocks back what’s already up. Match the product to the weed, and follow the label. Using the wrong one wastes money and can stain pavers.
In our experience, a Fremont driveway that gets full joint sand every couple of years and a pre-emergent pass in early autumn stays largely weed-free. One that’s been left open for a few seasons needs a season of consistent treatment to get back under control. If weeds are already winning, the underlying issue is the joints, not the weeds.
Reading Efflorescence as a Drainage Signal
Efflorescence is the white, powdery mineral deposit that shows up on concrete pavers, most often in spring. It’s calcium and other salts carried to the surface by water moving through the paver and evaporating. Many homeowners treat it as a cosmetic annoyance. In Fremont, it’s more useful than that: it’s an early indicator of where water is moving and not draining.
Where efflorescence appears tells you something. A light dusting across a whole driveway after a wet winter can be normal and often fades on its own. Efflorescence concentrated along one edge, a low spot, or against the garage apron points to water sitting where it shouldn’t. That’s a drainage question, not a cleaning question.
- Isolated, seasonal bloom: usually harmless. Sweep it, let the dry season run, and it often clears without treatment.
- Persistent bloom in one zone: check the drainage slope, the edge restraint, and whether the base is holding water there. Treat the cause, not the stain.
- Recurring bloom after every storm: a sign of ongoing moisture movement through the paver or base. Worth a professional look before it becomes a base failure.
Cleaning efflorescence without fixing the drainage that causes it just puts the stain back next spring. A specialty efflorescence cleaner removes the deposit; the drainage inspection is what stops it returning.
Repair Cost Benchmarks for Fremont Driveways
Knowing the ballpark lets you triage correctly: fix the small thing now rather than discover a big thing later. These are typical ranges for the Fremont market.
| Repair | Typical cost per sq ft | When it applies |
|---|---|---|
| Joint re-sanding | $1.50 – $2.50 | Scoured joints, October prep, routine maintenance |
| Base repair | $8 – $14 | Soft spots, settlement, rocking pavers, ponding |
| Full replacement | $18 – $30 | Widespread base failure, repeated repairs no longer economical |
The logic of these numbers is what matters. A 400-square-foot two-car apron re-sanded at $1.50 to $2.50 per square foot costs a few hundred dollars. The same area re-based costs several thousand. Full replacement costs more again. The maintenance task that prevents the jump is the cheapest line on the table by a wide margin.
Get a written price before any work starts. On a base repair especially, the scope of what’s soft underneath isn’t known until the surface comes up, which is exactly why the estimate needs to spell out what happens if the problem is bigger than expected. At Rowan Construction Group, no change proceeds on a job until the change order is signed, so the price you agree to is the price you pay unless you sign off on something new. A free second opinion on any written estimate is also standing offer, if you want a competitor’s quote reviewed line by line before you commit.
Common Mistakes to Avoid
- Sealing before re-sanding. Sealer over half-empty joints locks in the problem and lets the next storm finish the washout underneath. Sand first, then seal.
- Skipping the October re-sand “because it still looks fine.” A September driveway always looks fine. The joints are what fail, and they’re invisible until they’ve scoured. Check them in October whether it looks like it needs it or not.
- Using the wrong joint sand. Play sand and builder’s sand don’t lock into the joint. Use a graded joint sand, and polymeric where washout is the concern, which in Fremont is most driveways.
- Treating efflorescence as purely cosmetic. A recurring white bloom in one zone is water moving and not draining. Cleaning it without a drainage check just brings it back.
- Ignoring a hollow sound or a rocking paver. Both mean the base underneath has lost support. Left through a wet season, a soft spot spreads.
- Power-washing the joints out. A high-pressure pass blasts the joint sand out along with the dirt. That’s the opposite of maintenance. Sweep and spot-clean instead.
- Letting weeds set seed. Pulling weeds after they’ve gone to seed just means next spring’s weeds are already planted in the joints.
Fixing any one of these is cheap. Fixing them after a failed base is not. The maintenance calendar, followed loosely, keeps you out of the expensive column.
See the difference
 Before
 After
 Before
 After
 Before
 After
When to Call a Professional
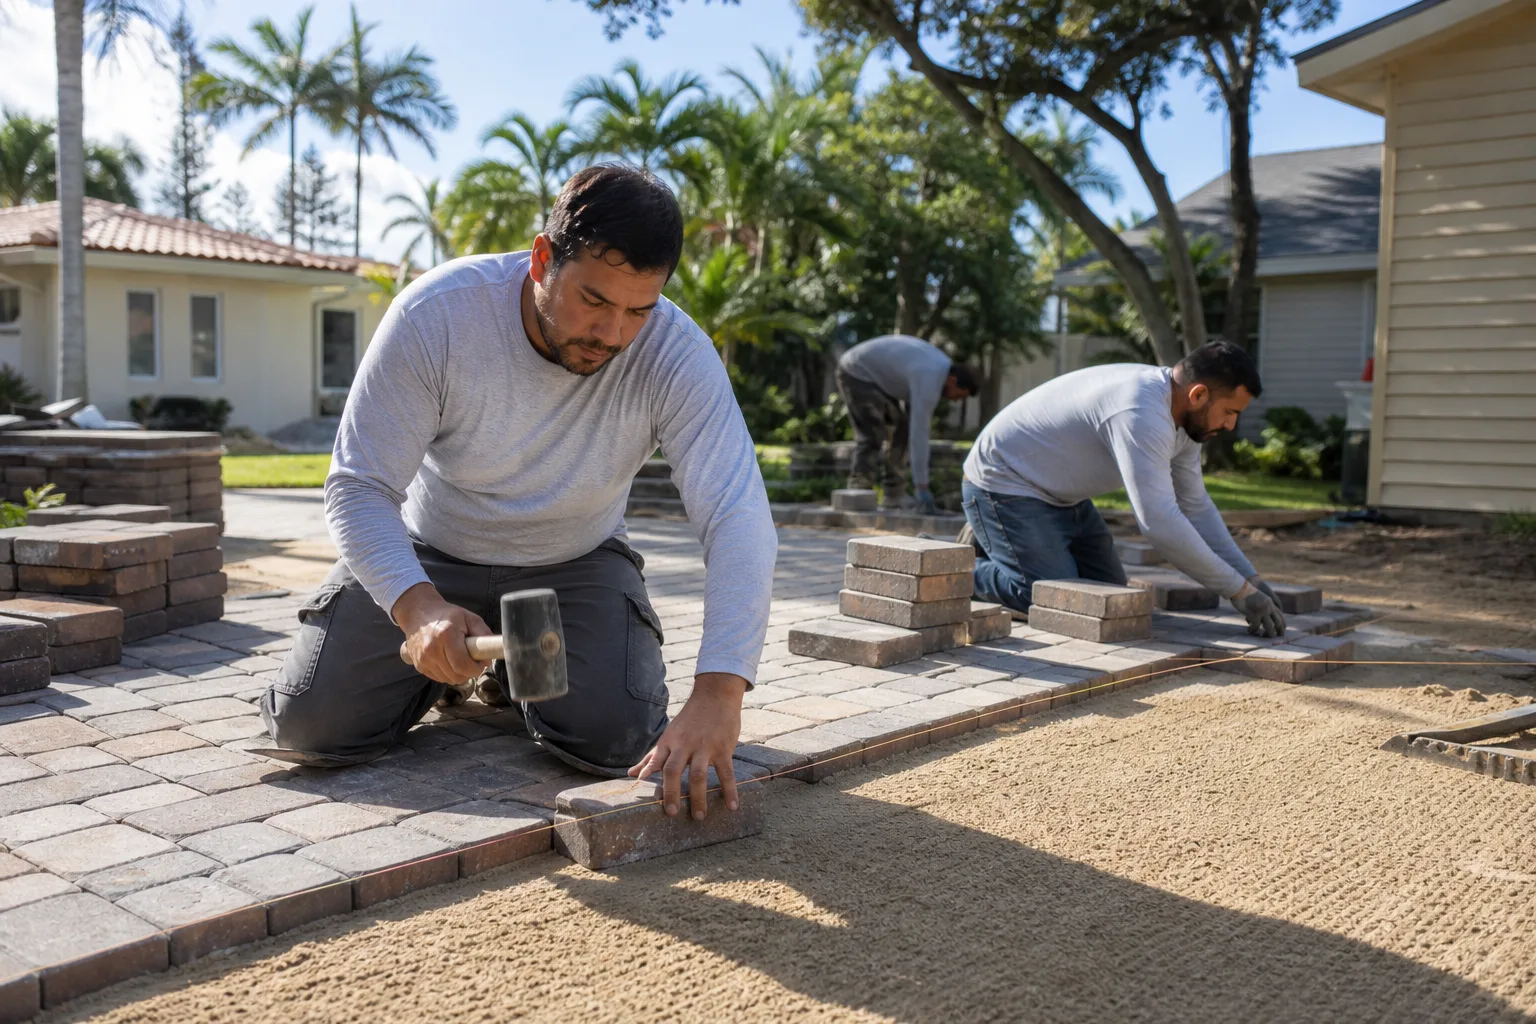
Most of this checklist is homeowner work: sweeping, probing joints, pulling weeds, checking drainage. Call a professional when the problem is under the surface. Soft or hollow spots clustered together, pavers that rock after a wet winter, ponding that doesn’t drain within a few hours, or a base that’s clearly failed are all jobs for a trained crew, because the base repair is where the money and the risk live. The same goes for a full re-sand if your driveway is large, heavily scoured, or set with a tight pattern like herringbone that’s slow to do by hand.
Rowan Construction Group Fremont offers free estimates in Fremont. Call (866) 797-6171 to schedule yours. Our technicians have up to 19 years of experience, crews are background-checked and uniformed, and every visit includes a documented photo record of what we found and what we did, so you keep the evidence. You can also start with the Rowan Construction Group Fremont home page to see all seven trades we handle.
Frequently Asked Questions
Joint re-sanding runs $1.50 to $2.50 per square foot, base repair $8 to $14 per square foot, and full replacement $18 to $30 per square foot in the Fremont market. Routine maintenance like re-sanding is the cheapest line and the one that prevents the others. Call (866) 797-6171 for an exact quote on your driveway – estimates are free.
October, before the first storms. Fremont’s rain arrives concentrated from November through March, and scoured joints wash out fast once the wet season starts. Full joint sand in October, polymeric where washout is a concern, is the single highest-value task on the calendar. If you miss October, do it as early in the dry window as you can.
Not always, but it’s worth reading as a signal. A light seasonal bloom that fades is usually harmless. A white stain recurring in one zone after every storm points to water sitting where it shouldn’t, which is a drainage question worth a professional look. Cleaning without fixing the drainage just brings the stain back next spring.
At Rowan Construction Group, no change proceeds until the change order is signed, and the written price is delivered before work starts. On base repairs the extent of the soft area isn’t known until the surface comes up, so the written scope spells out what happens if it’s bigger than expected. The price you agree to is the price you pay unless you sign off on a change.
Hollow or dull sound underfoot, pavers that rock, settlement, and ponding that doesn’t drain within a few hours are all signs of a soft base. Check for these after the wet season, in March or April. If you find clustered soft spots, get a professional read before driving on it further.
No. High-pressure washing blasts the joint sand out and makes the weed problem worse, because open joints are exactly where the seeds take hold. The right fix is filling the joints with proper joint sand and applying a pre-emergent before the wet season.
The Bottom Line
Fremont’s dry-wet swing is what breaks paver driveways, and the calendar is what protects them. Re-sand the joints and check drainage in October, before the storms. Walk the surface and listen for hollow spots in March, after them. Treat efflorescence and weeds as signals of what’s happening in the joints and base, not as cosmetic annoyances. Budget $1.50 to $2.50 per square foot for re-sanding and understand that it’s the line item that stands between you and a base repair or replacement. If you’d rather have a trained eye do the walkthrough, that’s a free estimate. Call (866) 797-6171 to schedule one.
For related exterior work, see our guides to Fence Installation in Fremont for perimeter drainage and edge restraint considerations, and Home Additions & ADU in Fremont if a driveway change affects a planned addition’s grading and access.
Written by the team at Rowan Construction Group Fremont.